Category Archives: Woodworking

New Fence

We decided we needed to replace the last remaining section of the crappy falling-down ugly fence that encloses the Back Forty. If we moved the whole thing forward (toward the house) about 10 feet, we could make the new section a straight run joining the existing two ends of the good fence, and avoid the obstacles that the old fence had to deal with. Here are some crappy cellphone photos documenting that process. (We had a contractor for this.)

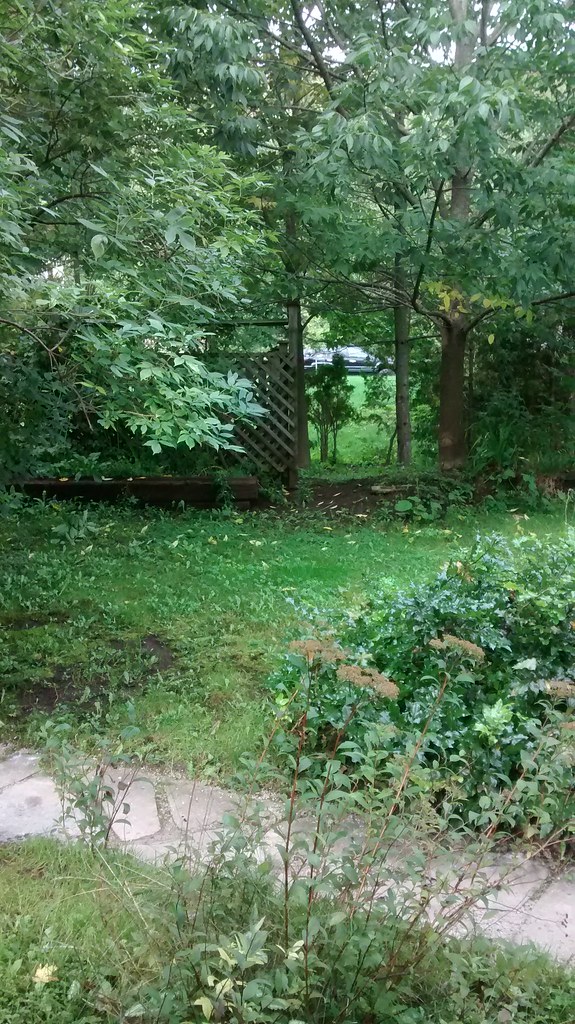
Below is the before picture looking west, where the flagstone path will intersect the line of the new fence and gate. in the background some of the old crappy fence can be seen. We did not tear that down yet, as we still needed to keep the dog contained.

Before - Path at new Gate Location

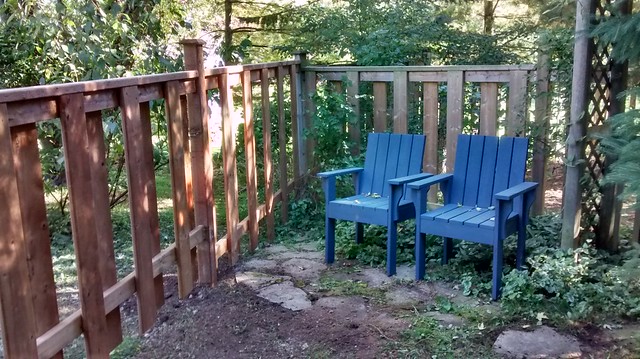
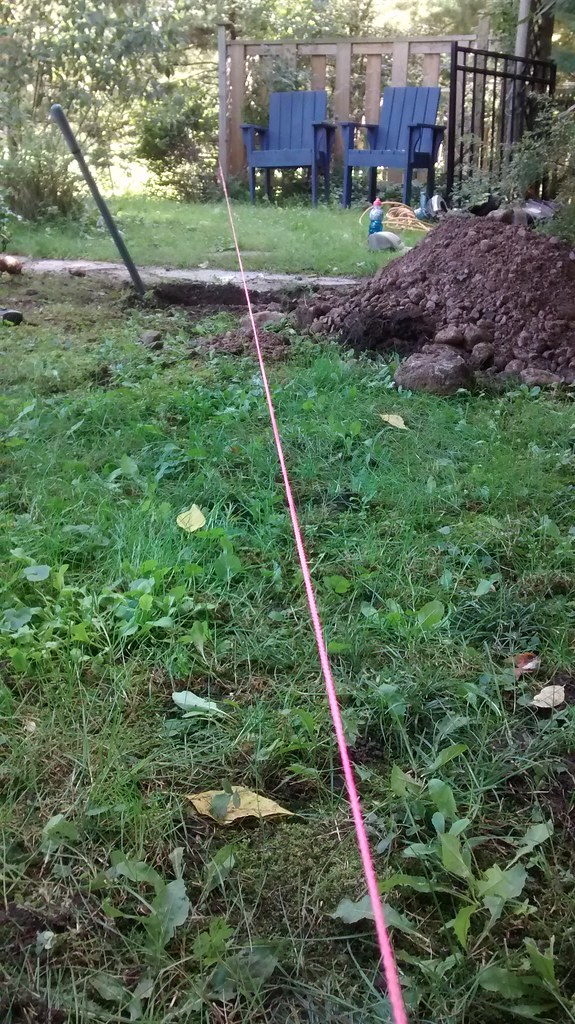
A string provides a reference to line up the holes. That short section of fence behind the blue chairs will remain, to define that corner, but it will no longer join the old crappy fence.

Stringline + First Hole

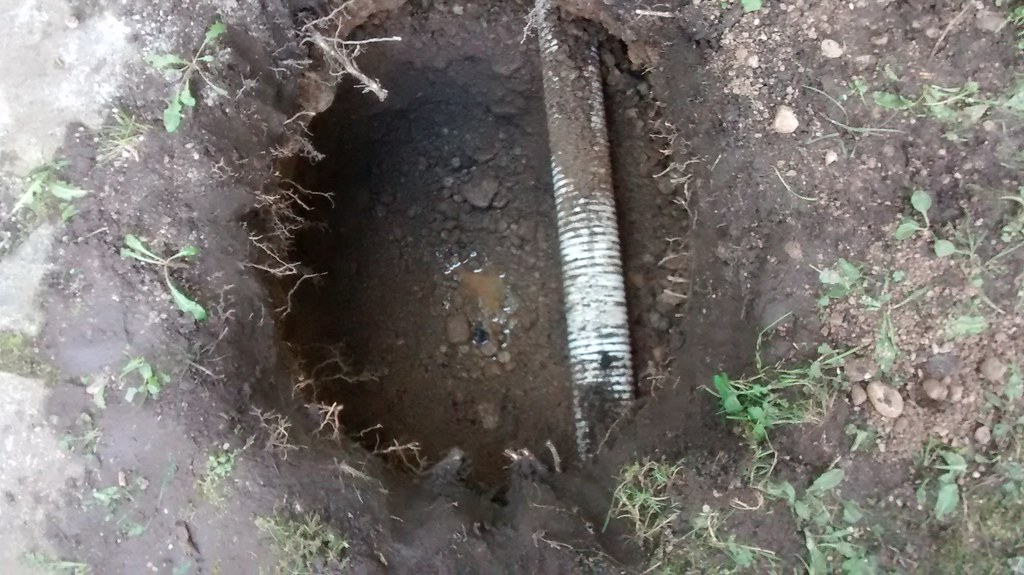
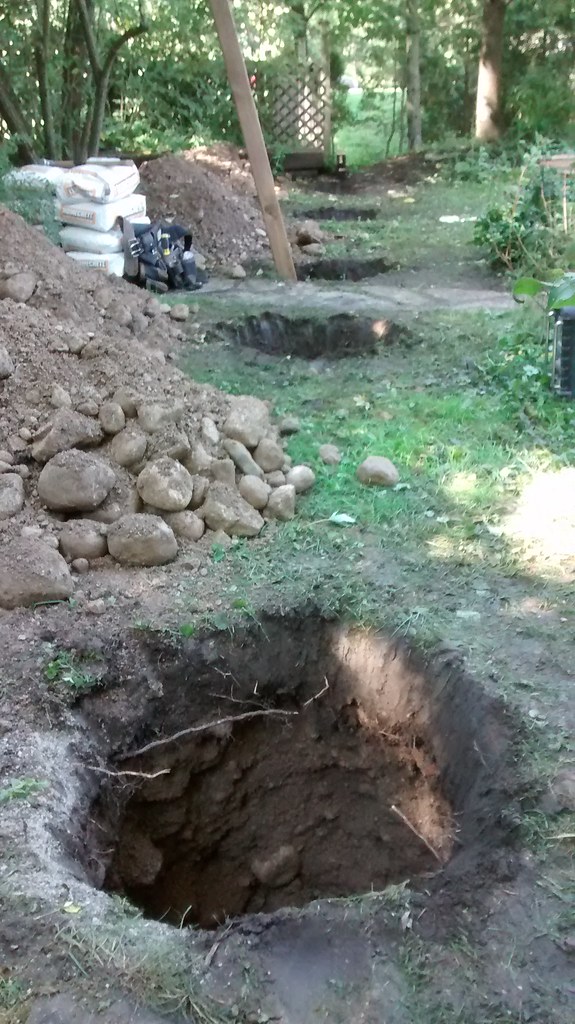
The first hole dug revealed a surprise: some kind of drainage pipe heading away from the house, probably coinnected to the weeping tile. We have never known of any drainage heading that way. It made us need to adjust the post hole location a little, and in fact another of the holes revealed another drainage pipe, running parallel to the first. No wonder the Back 40 can get kind of soggy in the low spots.

First Hole with pipe

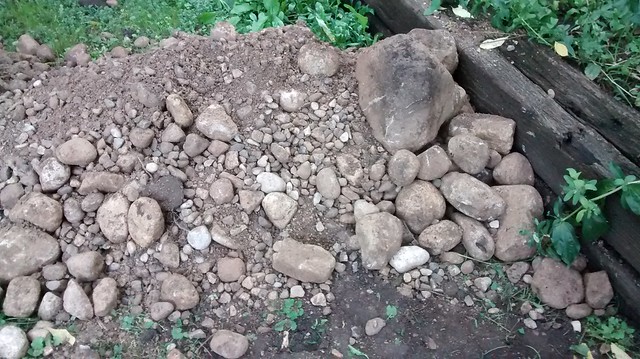
One thing we did predict was this. Me: “How long will it take to dig the holes?” Contractor: “Depends if we hit rocks.” Me: “Oh you WILL hit rocks…”

Rocks

All Holes Dug

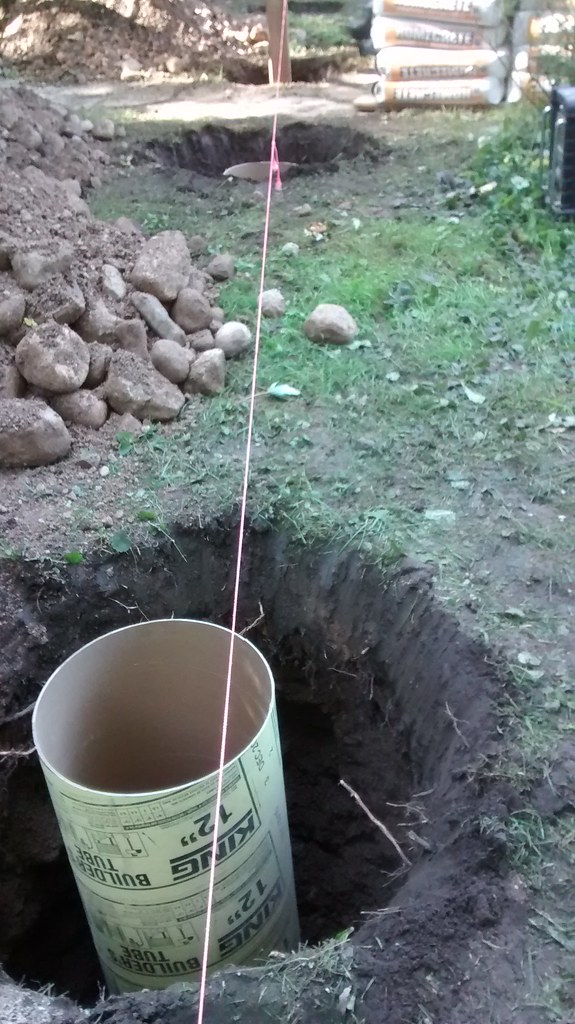
All holes finally dug, tubes in place ready for concrete.

Tubes

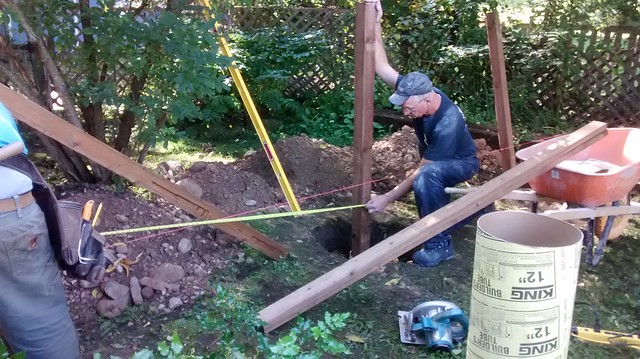
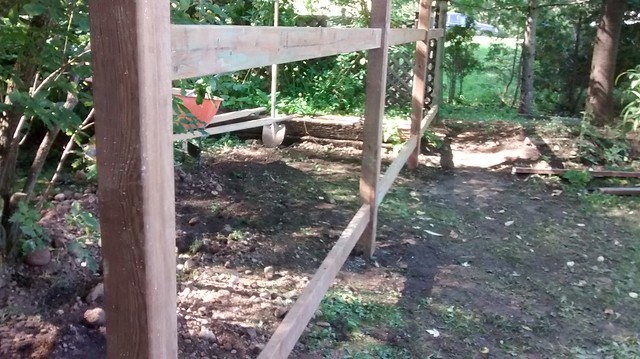
The posts need to be braced in two directions so they remain perfectly vertical as the concrete is poured.

Bracing the Posts

Posts are in Concrete

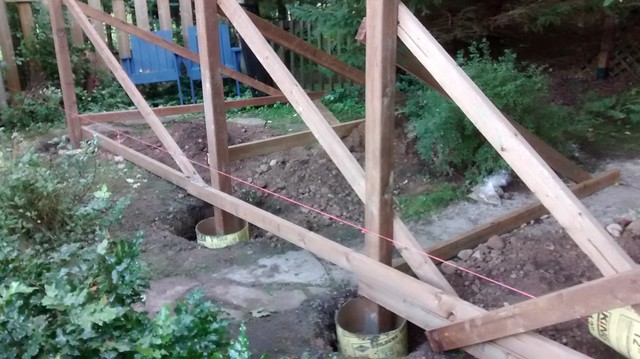
Once the concrete sets and the braces come off, next come the rails.

Rails

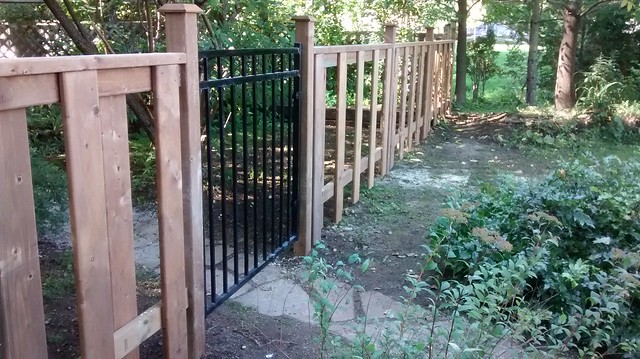
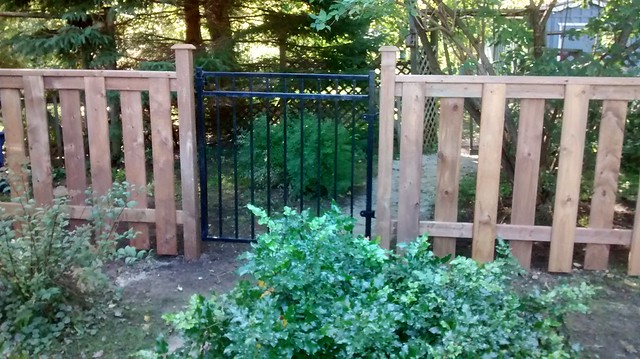
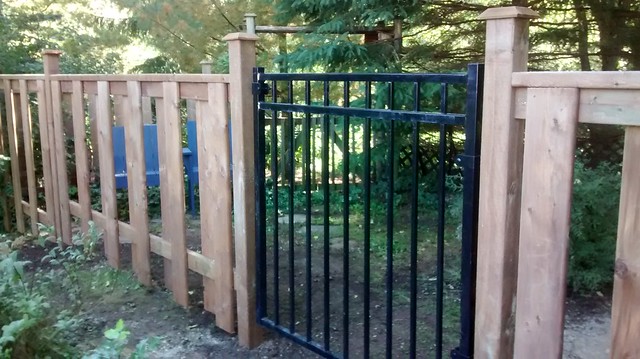
Rails, top caps, fence boards, post caps, install the gate, and we are DONE!

Done - Looking West

Done - Gate

Done - East Section (from South Side)

Done - West Section (from South Side)

Done - Gate Looking East

Front Hall Table

Finally finished finishing the finish on this small table for the front hall entry area of the house.

(click photos to view larger on Flickr)

Front Hall Table 1

The table is made of walnut with maple racing stripes for speed and agility. Standard mortise and tenon joinery was used. The finish is about 4-6 coats of Minwax Wipe-On Poly (more on the top).

Front Hall Table 2

The shape of the top is kind of a modified octagon. Octagons are a bit of a theme around here: there’s a small octagonal window above the front door, the front garden bed is octagonal. There’s even an octagonal planter (or small umbrella stand) pictured on the floor there in the corner.

Front Hall Table 3

I’ve been dawdling over this one all summer, nice to see it finally done.

Front Hall Table 4

Hall Table (Unfinished)

A small table for the front hall, this has not yet had any finish applied, and the top is not yet attached, but otherwise it’s done! Finally. I’ve been dithering over this one, both design and execution, for many weeks. This is its last stop in the shop before coming inside for final cleanup and finishing.

Hall Table Unfinished (1)

Lynda suggested the stripes would look better at the front, an idea I’m warming to. Don’t have to make that decision until I attach the top, though, which will be the very last thing. I do think the legs at the back in this view look a bit better facing forward.

Hall Table Unfinished (2)

(Click photos to view larger on Flickr)

Padauk and Holly Box

I made this small box (about 4.5 inches) from padauk and holly. The circle pattern was done on the lathe, then I spray-painted the whole lid. When it dried I scraped off the paint that wasn’t safely down in the circle grooves. Some paint stayed in the small pores of the wood as well, but that looked cool to my eye, so I went along with it.

Padauk and Holly Box

Padauk and Holly Box

Bubingapalooza

Bubinga and Holly Grinder
This is a small spice grinder, the last of the kits I got a while back. Saving this one for me, I think. I changed the shape a little from the other ones, seems to work for my hand. It’s made from some of my dwindling stock of figured bubinga, with a holly stripe.

Four Teeny Tiny Bubinga Bowls
I didn’t want to waste any of that lovely figured bubinga, so with offcuts from preparing the blank for the bubinga spice grinder, I made these teeny tiny bubinga bowls. I like to say “bubinga”.

Tinier and Tiniest Bowls

Three Teeny Tiny Treens
I just made these three little tiny things. I’m calling them “treens” here, but they don’t have lids, so maybe they’re bowls. They kinda look like shot glasses.

Tiniest Bowl
Okay, this is as small a bowl as anybody would need, outside of the dollhouse market I guess. It’s just under an inch high, and about an inch and a quarter across. Just BARELY holds two small earrings. The earrings belong to my wife, who came out with a rare “can I have it?” Another happy customer, especially as I gave it to her for free.

Lacewood and Maple Bowl

Lacewood and Maple Bowl
(click photo to view larger on Flickr)
I just made this sturdy little bowl from a sandwich of Lacewood and Maple, from the same stock as the two recent grinders. It’s about three inches tall, and just under 5 inches across at the equator.

Three-Drawer Jewelry Box

This is a 3-drawer box I just made, mostly walnut with figured maple drawer fronts.

3-Drawer Walnut Box

It’s about 8 inches tall, 6 inches wide, 5 inches deep. (My hand is shown for scale.)

3-Drawer Walnut Box

The design is from The Box Builder’s Handbook by A.J.Hamler, which I more or less stuck to in this case. I was happy I could incorporate the sapwood of the walnut (the lighter parts) in a pleasing way.

3-Drawer Walnut Box

I will probably add flocking to the drawer bottoms, but otherwise it’s done. So what’s next?