Category Archives: Woodworking

Rollerball Pen – Walnut with Maple wavy lines

Another nerve-wracking but successful Rollerball experience… no, not the 1973 James Caan movie… the equally harrowing Rollerball pen construction… actually it’s not that tough once you know what you’re doing…

This one is black walnut, with inset wavy lines made of maple. You can purchase any of my pens, or most of them, via my ETSY store, if you think you might like one for your very own…

www.etsy.com/shop/rgdaniel

“Churchill” style Rollerball pen


"Churchill" style Rollerball pen, originally uploaded by rgdaniel.

OK now I’m REALLY excited… this is a so-called Churchill-style pen, and one that Winston himself might have been happy to sign important stuff with. The rollerball technology gives fountain pen performance and class, with none of the fuss.

It’s made of African Spalted Stinkwood, which does NOT stink, with a Black & Titanium Gold finish. Several coats of turner’s polish and several coats of wax.

This pen is available for purchase on Etsy.

Celtic Wavy Line


Celtic Wavy Line, originally uploaded by rgdaniel.

My new favourite pen that I made just now! Purpleheart with maple accents including the two wavy lines. It’s the same technique used for making a Celtic knot, but I only took it as far as this, the historically less common Celtic wavy line.

Check out the video on YouTube!
http://www.youtube.com/watch?v=c-zMiJN_kkI

Five Custom Pens


Five Custom Pens, originally uploaded by rgdaniel.

These are some recent pens customized from the basic kit, which involves (at least) replacing the stock centre band with a larger wooden one. Sorry about the price tags, I should have taken the picture BEFORE I put those on… tacky…

(l-r) Curly maple w. purpleheart; Purpleheart w. maple (2); Maple burl w. purpleheart; Olivewood w. purpleheart.

The 2nd from the left is my favourite pen EVER, would hate to see it go… you can see how purpleheart regains its purpleness over time, compared to the more recent one next to it…

Two Breadboards


Two Breadboards, originally uploaded by rgdaniel.

Two new breadboards, hard maple with purpleheart racing stripes. Aproximate dimensions: (l) 8″ x 12″ x 1″ and (r) 9″ x 12″ x 3/4″. They both have a recess routed into each end from the underside, so it’s easier to get your fingers underneath to lift them and set them down. I see the left one as more of a cheese tray, perhaps.

Five Pen and Pencil Sets


Five Pen and Pencil Sets, originally uploaded by rgdaniel.

That’s it for these… unless I get more kits. Materials are (l-r) African Spalted Stinkwood; Zebrawood; Purpleheart; SE Asian Red Palm; Maple Burl. As with anything made of wood (or acrylic in some other cases) that you see here, please let me know if you’d like to own them for your very self.

Pau Ferro Wine Stopper


Pau Ferro Wine Stopper, originally uploaded by rgdaniel.

Finally got around to trying out these new stopper kits. The Lee Valley stoppers came with nothing, so I was kind of flying blind. These new ones came with a proper mandrel and drill bit, so no centering issues. The wood is pau ferro, which I love, but I’ve not too much left now. Should be enough for a few more stoppers though.

Valentine Heart


Valentine Heart, originally uploaded by rgdaniel.

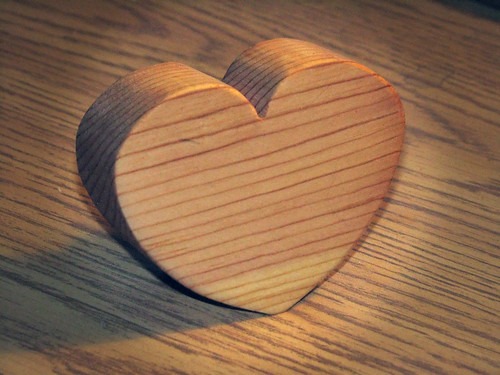
I wanted to whip up a little something in the shop for the Love Of My Life, but I needed something I could build quickly, since the shop is freezing. This is what I came up with.

It’s made from the last bit of naughty pine — sorry, KNOTTY pine — from the Step Stool project. I freehand drew half a heart onto a scrap of plywood, cut it at the bandsaw, cleaned up the edge with the sanding drum, then drew the outline onto the workpiece, flipping the template for the other half to ensure symmetry. Back to the bandsaw to cut the final can u order phentermine online shape, back to the sanding drum to clean up edges. Hand sanded the inside of the curves at the top where the sanding drum can’t reach.

Finally, I laid out a line that would cut off enough of the bottom to allow it stand on its own, but at an angle so that the front is intact, retaining the full heart shape. To make the cut, I taped the heart to a wedge-shaped scrap that happened to be the right angle and took it to the bandsaw. Final sanding, quick coat of mineral oil, and back inside to thaw out my hands…

Lynda loved it. Yay!