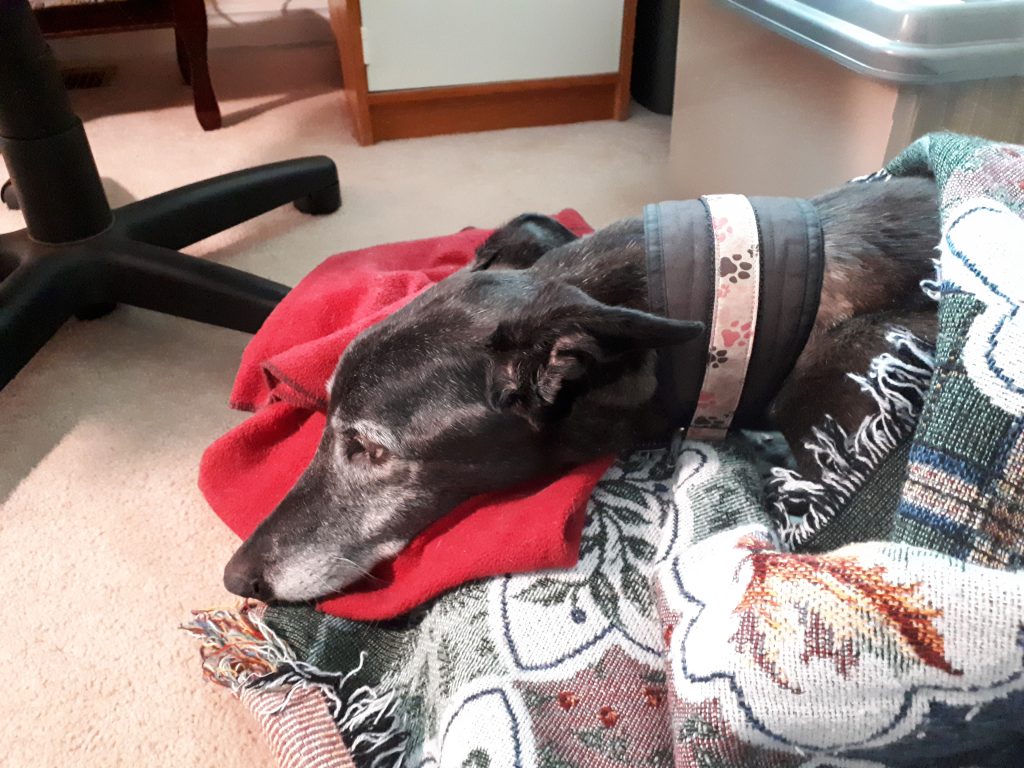
We had to say goodbye to Cody, our sweet sweet boy, today. It was time. He was all skin and bones, and starting to go downhill quickly. I don’t think he was full-on suffering quite yet (he was such a suck that he would have let us know, I think) but he clearly soon would be, as things had begun to escalate.
We adopted Cody in May 2013 from an organization that placed retired racing dogs from the States. There was a bit of a mix-up, though. He came to us with the call name Cody, and racing name Cactus Gold, but some time later, we got a phone call saying that his real call name was Casey, racing name Toots Satellite. We were already calling him Cody at this point, so we stuck with that. (Casey, as it turned out, would be the name we gave our second greyhound years later, as an homage).
Being our first greyhound, we were at first a bit taken aback by the sheer scale of him. He was a big boy, and oddly proportioned. Teeny tiny waistline, giant chest. Like a Barbie Doll crossed with a horse. Kinda.
One of the first things he did, was VERY tentatively walk out onto our little dock, and then soon after, just walk off the end, into the pond. I think it was either his first dock or his first pond. (He was fine, just wet).
And oh my goodness, did Cody love to run! Not surprising for a greyhound, I suppose. Any time of year. Mud season was not fun for the cleanup crew, but something about fresh powder in winter seemed to really rev him up (Casey too, it would later turn out). At one point after that clip was shot, I measured the distance between where he left the ground and where he returned to earth. I don’t remember exactly, but I think it was twelve feet. Serious hang time!
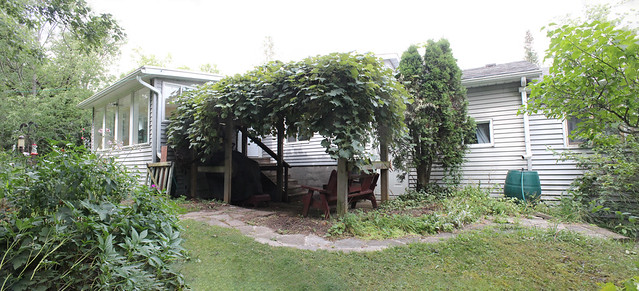
August 16, 2019 We’ve been getting ready to start a fairly major renovation… the sunroom is coming down. Mainly because it’s sinking into the ground due to having been cheaply and shoddily built in the first place by the previous owner.
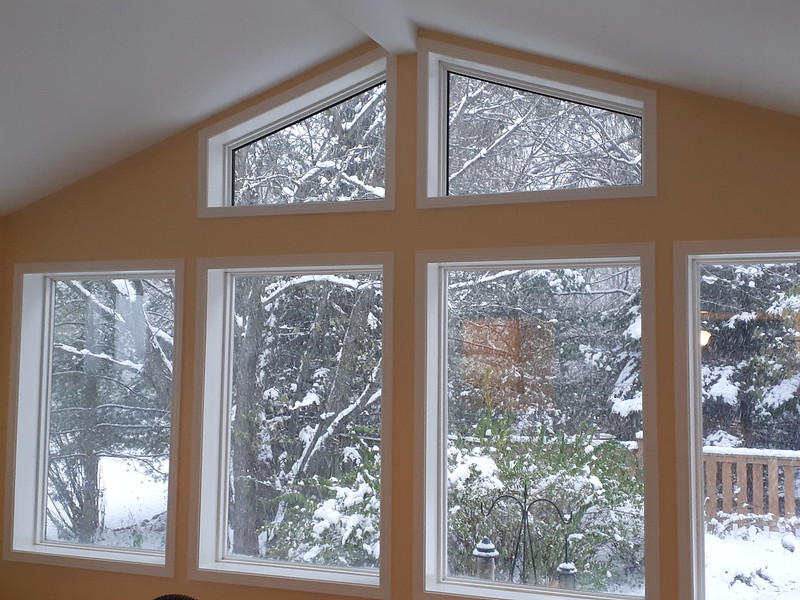
The most obvious symptom of the problem is the fact that the front of the room (the part not attached to the house) is slowly sinking into the garden, leaving our windows trapezoidal in shape, with a sizeable gap where the wind comes whistling down the escarpment and into the house. Come winter we have to fill the gap with extra chunks of foam insulation strips. Also (not shown) the plaster is cracking where the wall joins the house, and the side door is so out of square as to be pretty much unusable.
Lynda has been busily rescuing plants from the sunroom garden, with my help as needed, replanting elsewhere or into pots.
August 24 – Today the grapevine came down. Kind of sad, it was having an especially good year, conditions for grapes were very good, it would have been a banner year for jelly or chutney. We hope to replant it to the right of the patio so it’s not all smushed up against the house like it has been. It’s currently planted underneath the stairs. Hopefully the digger can dig it out of there after the stairs come down. (photo by Lynda)
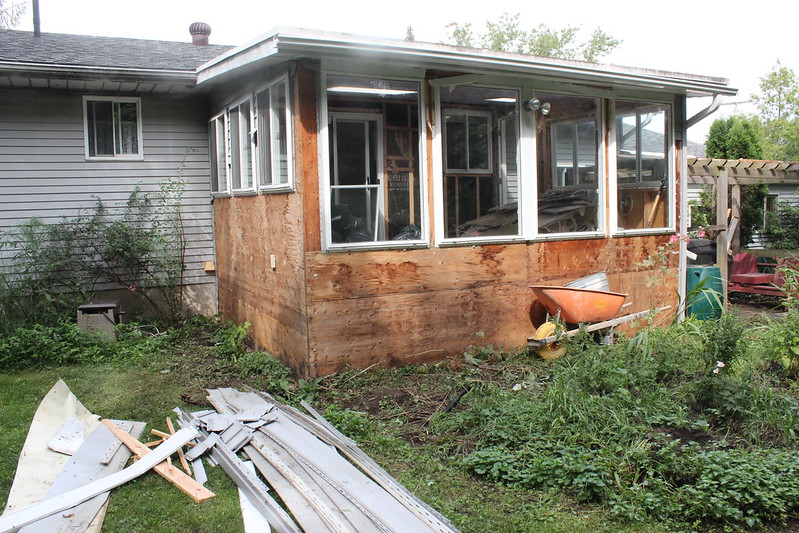
August 27 (Reno Day 1) Today the contractors arrived to start demolition of the sunroom. The vinyl floor was liberated for reuse in the laundry room, and the drywall (inside) and the siding (outside) was liberated for reuse in the landfill.
August 29-30 (Reno Day 2-3) Demolition of the existing sunroom continues today and tomorrow. They’re very systematic about it, no surprises so far. Lots of trips with hunks of our home in wheelbarrows moved around front and heaved into the giant Dumpster in our driveway (turn left at the Porta-Potty, not shown). Lots of reciprocating saws and sledgehammers and pry bars taking the place apart, stick by stick.
Note that all photos in this series are hosted on Flickr in the Sunroom Reno 2019 album.
One of the first things we had to do was move my precious pergola (it has held up well, unlike its ill-fated predecessor) out of the way, back down the lawn.
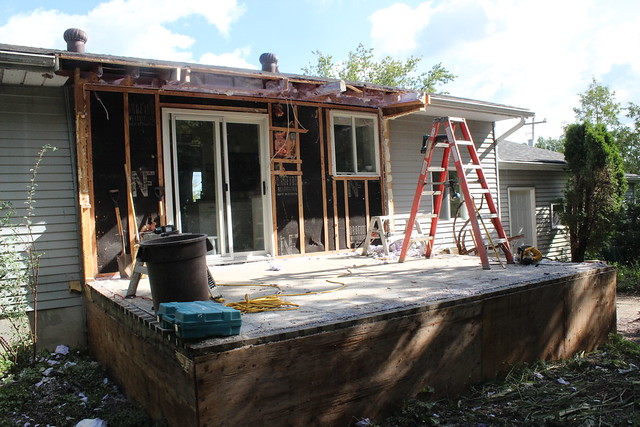
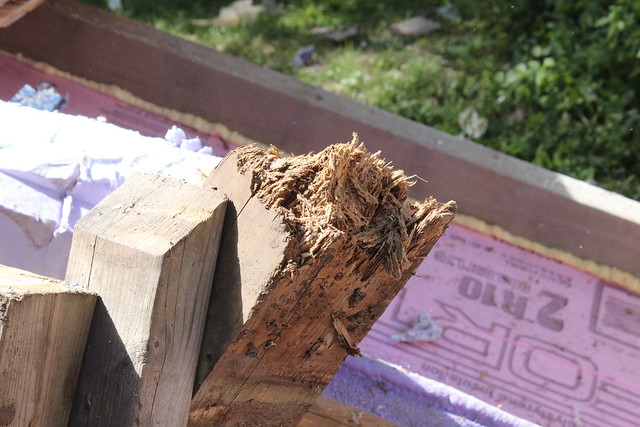
Down to the ground! Well done, just in time for the long weekend! (Those of you with actual jobs can relate). Seen in the photo below, and as Brad is about to point out in the photo above, is the bottom of one of the support posts that was holding up the sunroom. It was just sitting in the dirt, slowly rotting away. No wonder the sunroom was sinking. Not exactly up to snuff, building code-wise.
September 3-4 (Day 4-5) The last couple of days have involved finishing demolition of the sunroom and removing the debris (the enormous rubbish bin has now been removed from our driveway) and starting (and ALMOST finishing) the digging of the hole to receive the foundation.
Our grapevine, having been pruned back to almost nothing in order to be able to get the pergola out, is the last thing standing, and the first to feel the teeth of the Bobcat. It has been replanted not far from here. Note the still undisturbed and cleanly raked topsoil in the background, soon to be very much NOT undisturbed.
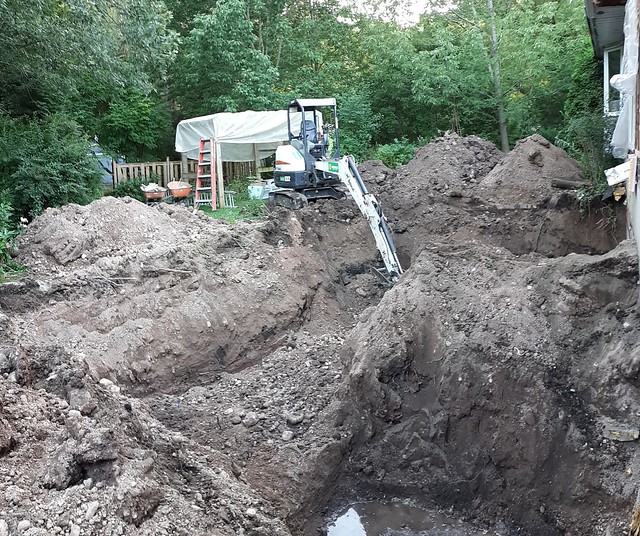
The Bobcat in action, Brad at the helm:
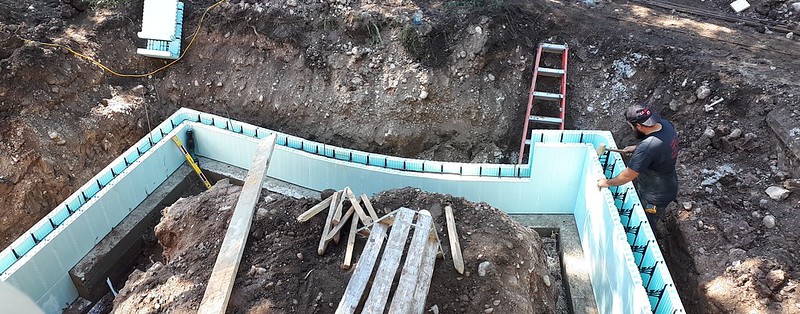
The cellphone pano below shows the nearly completed hole, and the mountains of dirt still needing to be trucked away. Probably three times this amount has already been removed, but it did not quite get completed in one day, as hoped.
September 5-6 (Day 6-7) The week culminates at a logical stopping point, with the pouring of the concrete footings.
I’ll start a new post on Monday, this one’s getting a bit long…
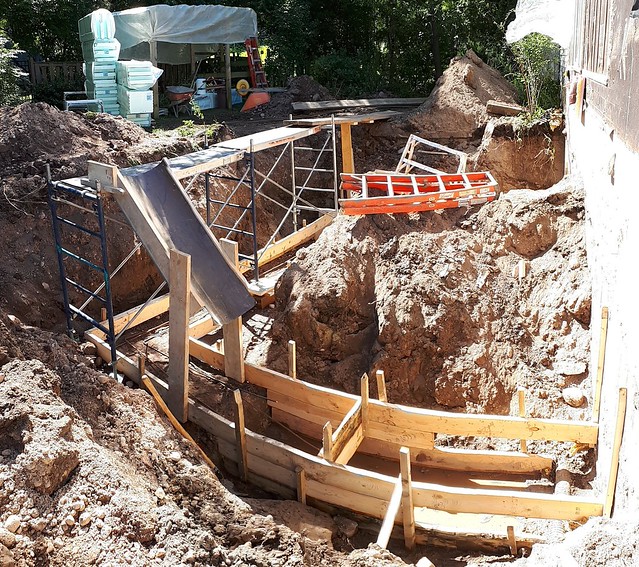
September 9 (Day 8) The Styrofoam-insulated foundation walls are mostly in place after today. One more row to go, and some tweaking with the laser level, and they’ll be ready for the concrete, tomorrow or the next day. Some wet days ahead, looks like, so fingers crossed.
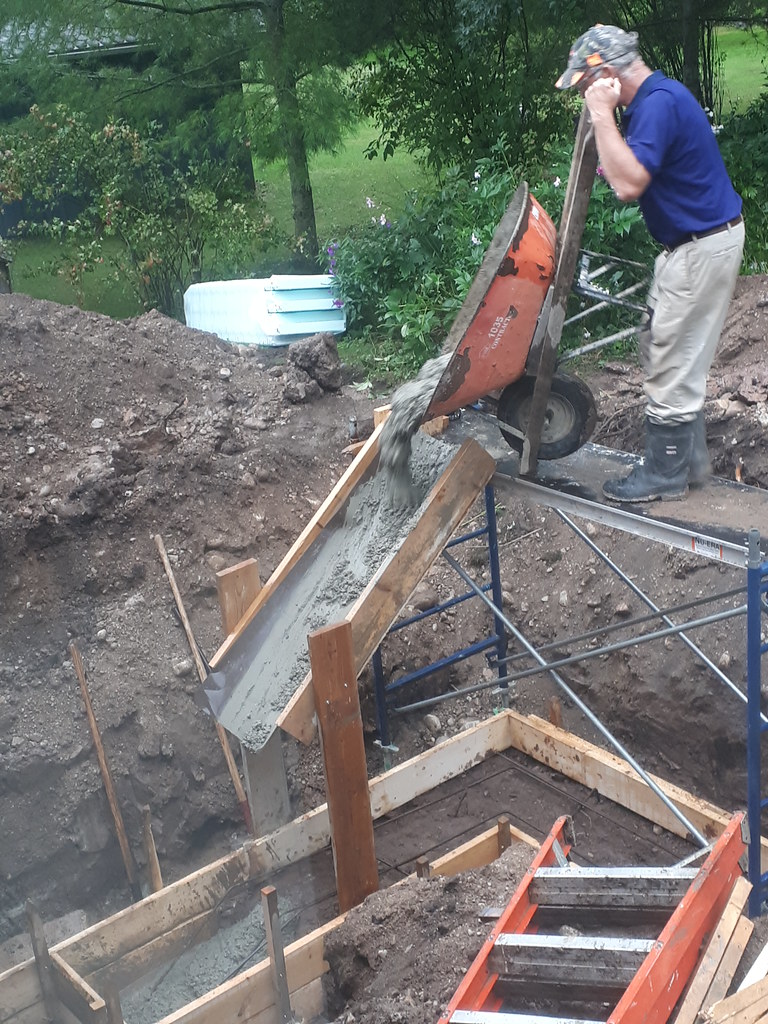
September 10 (Day 9) By the end of day 9, the insulated walls of the foundation now appear to be ready for pouring concrete. The Styrofoam walls are at final height, the opening for the crawlspace door is framed and braced, the whole structure is leveled and braced, and a walkway is ready for human oversight of the concrete being poured down into the opening. Presumably tomorrow, weather permitting.
September 11 (Day 10) Today, the Styrofoam-insulated foundation walls had their cement poured. Sadly, we were out of the house at the time (they came early) so we missed the photogenic drama of a giant articulating arm flying in the cement OVER the house and down into the walls. In other words, no pictures. (Sad face emoji)
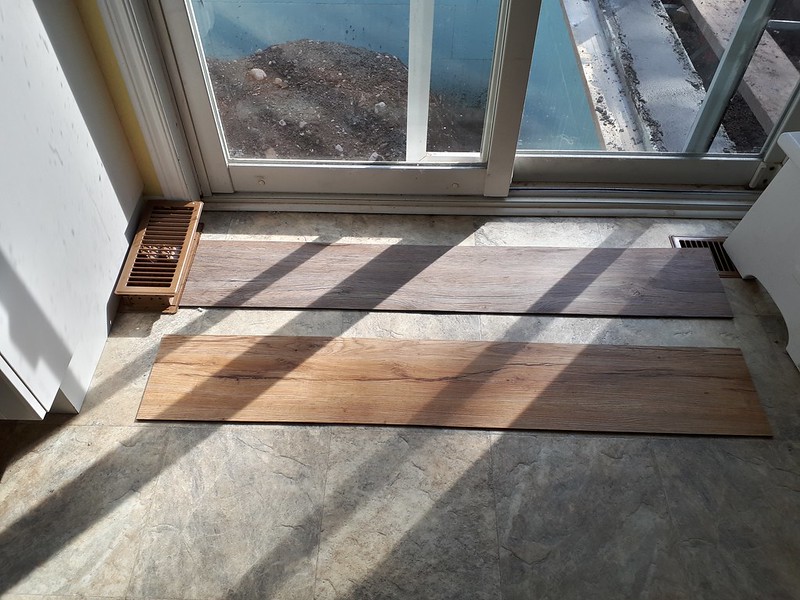
One of the reasons we missed the pouring of the cement from over the roof is that we went out to order the solid vinyl flooring we had in mind. As often happens though, we hit a snag. The widest roll was not quite wide enough, and it would have meant ordering twice as much, and wasting almost half of it. We decided, after considering several options, to go with these vinyl planks. They look disturbing realistic, like weathered barn wood, but they’re vinyl and about an eighth of an inch thick. Bit more expensive than the full sheet, but way cheaper than having to buy TWO full sheets. Also, we can order only as much as we need, and apparently, single planks can, through the application of heat, be removed and replaced if they get wrecked. We brought home a couple of samples, and seeing it in situ we’ve landed on the darker barn board-looking choice.
Laundry room: A part of the overall sunroom project will be a facelift for our little laundry room. The vinyl flooring from the old sunroom was recovered and will be re-used in the laundry room and back stairs. The horrible and ancient cabinet over the washer and dryer, which was hanging by a thread, was removed and will be repurposed in the shed, where it will hang by stronger threads if I do it right. New light fixtures in the laundry room and downstairs hall. And, in work that began and mostly finished today, the window in the laundry room moves a foot or so to the east, to allow for the slightly offset (from its original footprint) east wall of the new sunroom. Sorry, didn’t get before and after pictures.
September 12 (Day 11) Work continued on the laundry room today. The drywall was replaced around the recently-moved window and the appliances were disconnected and moved into the garage.
Meanwhile, the upper part of the foundation wall (the part that remains above-grade) was sanded and a mesh applied. I think this is to help the final coat of parging to adhere to the wall.
September 13 (Day 12) No pictures today… Work was done only in the laundry room, which is even emptier than yesterday as several layers of old flooring was ripped up (not a quiet process!) and some initial mudding of the walls. They will be back for a while tomorrow to do some parging on the foundation walls.
September 14 (Day 13) A short day today (Saturday) – they just added the second (final) coat of parging to the outside walls of the foundation. No work on the laundry room, so it was a blissfully noise-free day.
September 16-17 (Day 14-15) The last two days will prove memorable for two things: the incessant and almost insufferable din of heavy machinery and, perhaps not unrelated, the failure of our internet connection (still down as we speak).
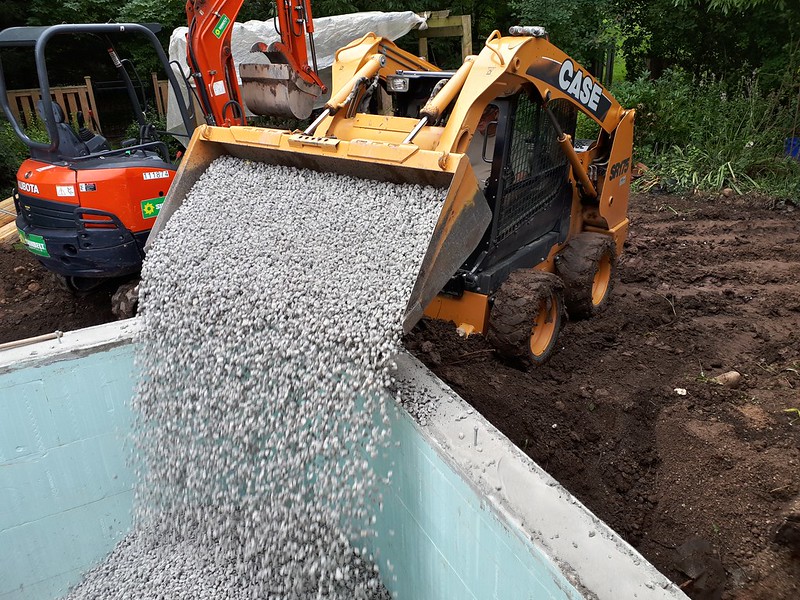
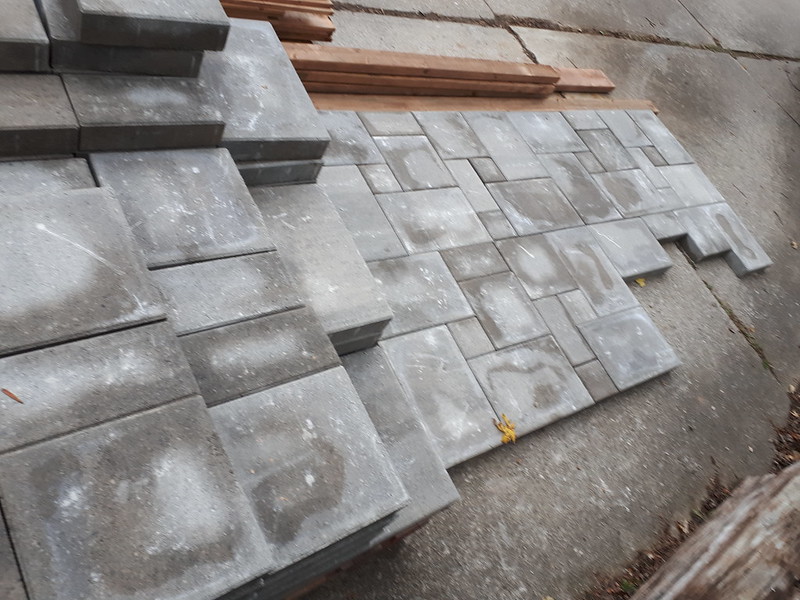
By end of day Tuesday, the inside of the foundation (the crawlspace area) had gravel up to level, tamped down and ready for a concrete pad; the patio area had drainage weepers, gravel, landscape cloth, and fine stone ready for pavers (on order).
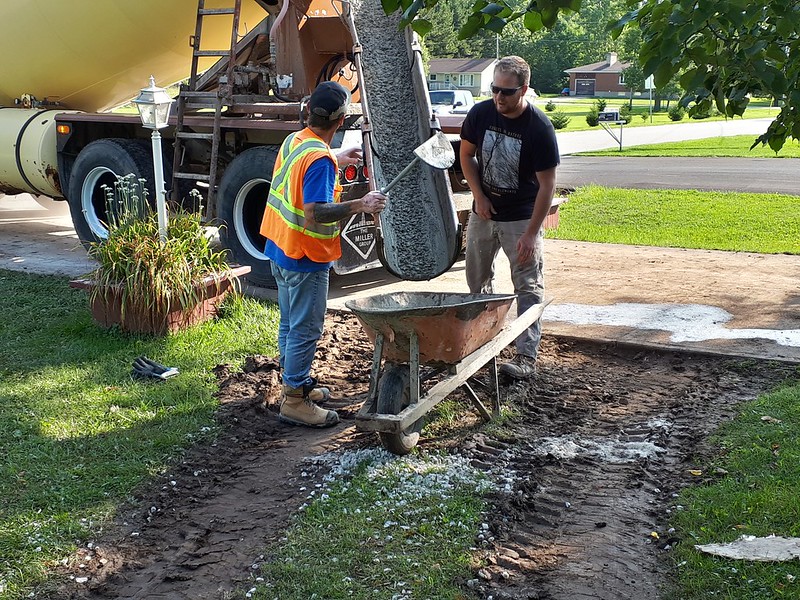
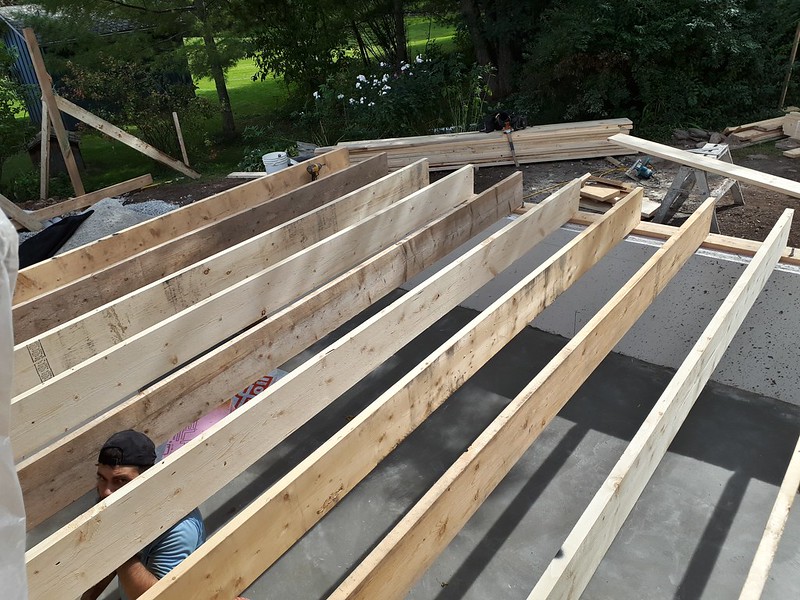
September 18-19 (Day 16-17) Lots of activity the last couple of days (not all shown here). On Wednesday, more concrete was wheel-barrowed around for the crawlspace floor. Three post holes were dug and posts installed in concrete for the patio privacy fence on the east side. In the laundry room, the sub-subfloor was stiffened with hundreds of screws, before the subfloor was installed. Prep for painting was also continued. On Thursday, wall prep continued, along with some painting. Ledger board was installed where the sunroom floor will attach to the house, and the floor joists followed shortly after. Also on Thursday, Internet service was finally restored!
September 20 (Day 18) First wall almost ready to be lifted up into position. This is the east wall, with two windows and one door. The windows and doors are standing by in the garage (see Day 11 above), but I suspect we’re not quite ready for them yet…
On Sunday, the flooring installer will be coming to install the flooring (duh) in the laundry room, then work will continue in earnest on Monday, where we’ll pick up with Part 3.
September 22 (Day 19) Mostly quiet today (Sunday). Only the flooring installer was here, and he did a stellar job of meticulously placing the repurposed vinyl floor from the old sunroom to here in the laundry room. We had just enough to cover the whole area including the room itself, into the closet behind and up the stairs to the kitchen.
September 23 (Day 20) Work continues today on both fronts, despite it being a bit wet outside from rain overnight. The dryer vent pipe was installed, down through the floor and out to the patio, under where the new stairs will be (roughly where it was in the past, but a bit lower). For the sunroom, there are now two walls standing, with work proceeding on the roof.
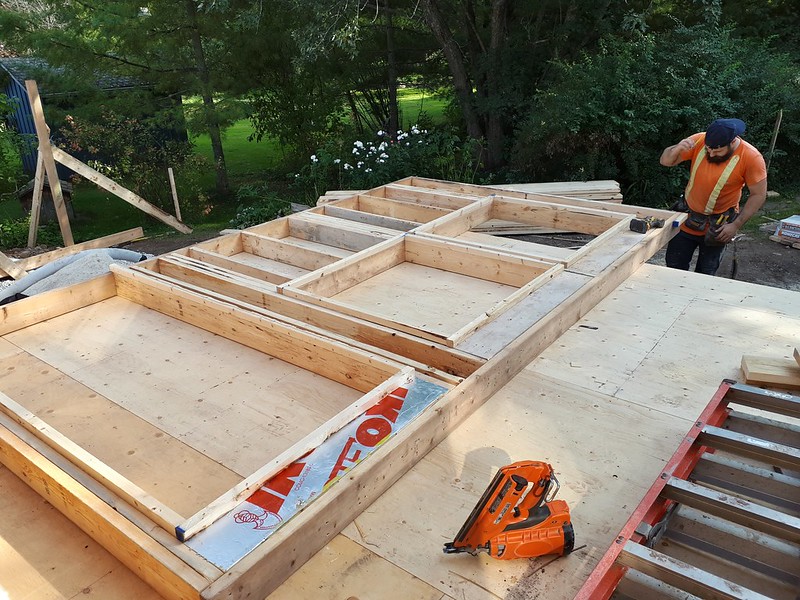
September 24 (Day 21) Productive day today. The washer and dryer are back in the laundry room and working, freeing up space in the garage. And the sunroom is really starting to look like something. The front wall is framed for all eight windows, the four pre-existing windows (still parked in the garage) and the four new triangular windows (to be ordered) up under the peak. Starting to really look like something!
September 25 (Day 22) Not too much going on today: the trim was re-installed in the laundry room, and some OSB added to the walls outside. The crew left early for their annual Algonquin Park canoe trip, back Monday. Meanwhile, speaking of the laundry room, before they left, they noticed the washer was leaking from somewhere underneath (not the connections). The thing came with the house, we figure it’s about 15 years old, so we didn’t hesitate to go out shopping. New Maytag arrives Tuesday, we hope.
September 30 (Day 23) After a bit of a long weekend, the crew is back on the job today, working mostly on the roof, finishing the framing where it joins the house, and starting on the sheeting, which should be done by the end of the day. Good thing, since it’s looking the rain the rest of the week…
October 1 (Day 24) Highlights of the day today: Skylights went in, so the roof is more or less keeping the rain off the floor. (Windows, not so much). Electrician was here and the sunroom is mostly roughed-in (except the heater… different circuit). Insulation guy was here briefly, getting the lay of the land and coordinating with our general contractor. And also, our new washing machine arrived.
October 2 (Day 25) More work roughing in the electrical today, plus the roof is fully shingled now, I think. The sunroom floor was finally swept and cleared of debris (another garbage bin arrived in the driveway yesterday) so now you can walk around like a regular room. Won’t be long before the windows and door go back in and we get the space closed up (although I suspect the custom upper windows will be a while longer).
October 3 (Day 26) HVAC work going on today. The sunroom will have three heat registers. It was going to be four registers, but our decision yesterday to get rid of the sliding door concept altogether means we already have a kitchen register quite nearby where the fourth sunroom register would have been. The sliding patio door, a holdover from the time before there was a sunroom at all, let in lots of light, but the standard pocket door we were originally planning would have blocked much of that light from reaching the kitchen. So we (i.e. Lynda) decided to scrap that idea and just make it a walk-through opening between the kitchen and sunroom. Good idea.
Also today, seven of the nine original windows were retrieved from the garage and placed back into their new home. Two more windows and the door will go back in tomorrow. The side windows had to be shimmed back into square — they were distinctly trapezoidal when they were taken out, due to the slow sinking of the front of the old sunroom.
October 4 (Day 27) Work continued in the sunroom, prepping for insulation and siding, and in the laundry room, installing and caulking trim. No pictures today. Also, I bought a new car.
October 7 (Day 28) Picked up new sunroom flooring and brought it home… don’t need it quite yet, though. New cabinet was installed in laundry room. Old siding removed from garage, so we can have matching new siding along whole back of house… but, some rot was found around the rear garage window (no caulking in original install).
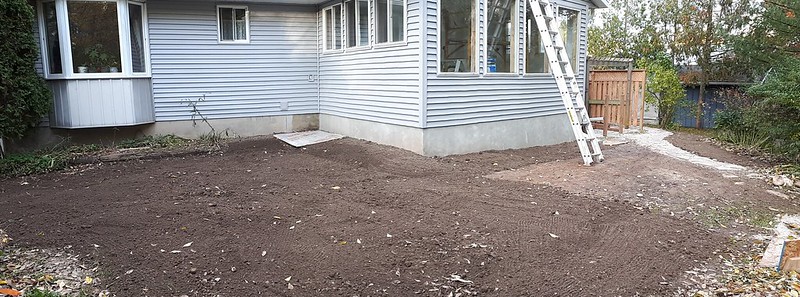
October 8 (Day 29) A couple of loads of topsoil were delivered, which will eventually be spread around the damaged areas of the lawn, but for now is covered with a tarp.
The rot around the garage window was repaired, and fresh house wrap and new siding was installed. The inspector reminded our contractor that stairs over a certain height required a landing at the top of the stairs, so the bottom of the stairs will come closer to the back door than originally thought, but it looks like it will work out okay (just). Also today, the insulation people were here and spray-foamed the place.
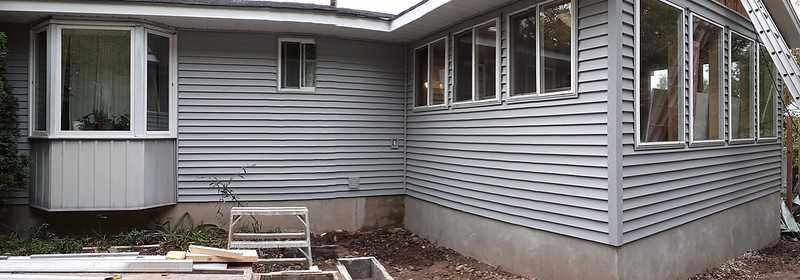
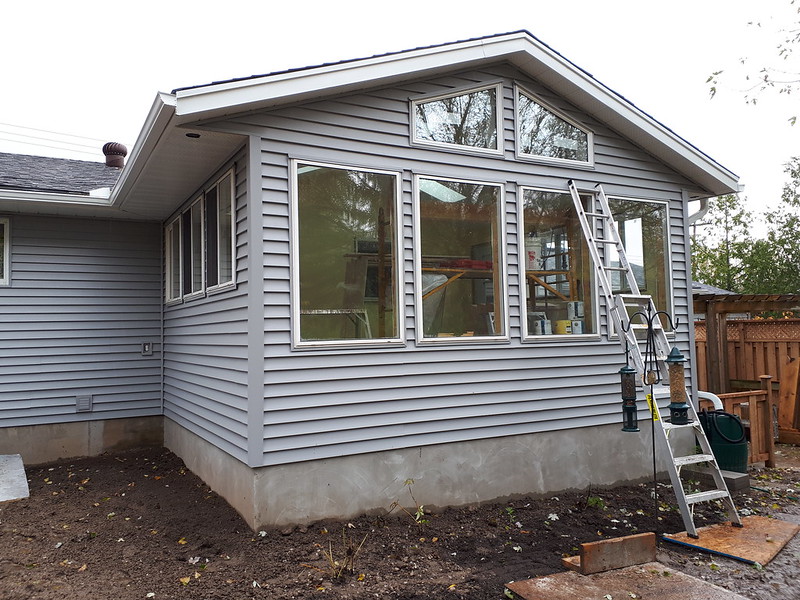
October 9 (Day 30) Siding pretty much done on this side of the sunroom and along the garage wall. Also, the door is in. Stairs, not so much, but at least the room is closed off from weather now.
October 15 (Day 33) After a couple of days of incremental changes to the exterior (siding, soffits and fascia, mostly) and a long weekend, we start Tuesday morning with a hopeful sign… the arrival of drywall! With rain in the forecast but not appearing, though, the crew spent most of the day outside re-leveling and prepping the base for the patio, bringing some of the stones around, and working out the pattern. Lynda provided some consultation on the pattern design, and I provided a line drawing to post on the job site.
October 16 (Day 34) Well it was a rainy day, so nothing got done outside, but the good news is that most of the drywall got installed inside. Additionally, we bid a sad farewell to our sliding glass door between the kitchen and the sunroom. I say sad, because during this reno it has served us well in a couple of ways: it kept the noise and dust down to a minimum, and it allowed us to lock the house up. Now that the sunroom door is re-installed, we can lock up the regular way. Some rot was found under the sliding door, but not too much considering it was probably original to the house, from before there even was a sunroom, and it’s been repaired. The kitchen now opens directly into the sunroom, and it all feels very wide open. Digging the feng shui.
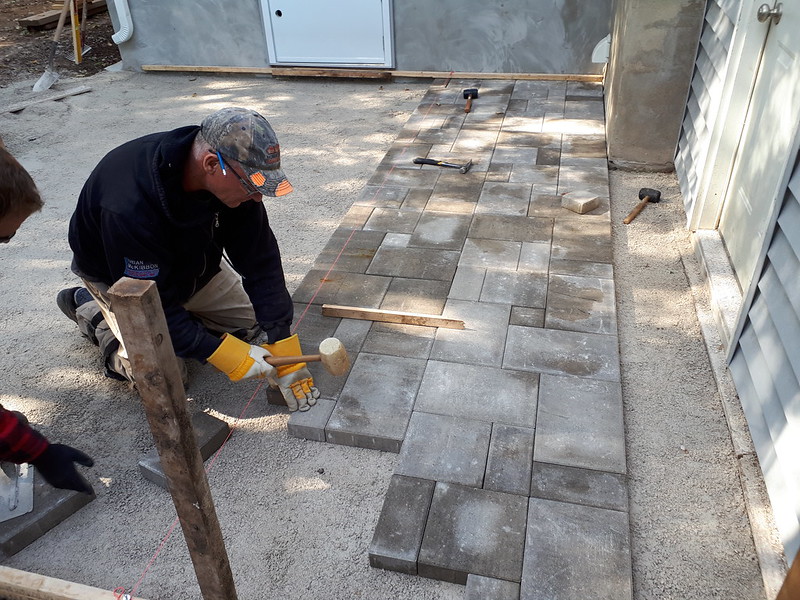
October 18 (Day 36) No rain today, so lots of progress on the patio stones. The majority of the patio was laid by end of day, with the tarp back in place for the weekend. Eaves troughs were first installed on this side of the house to direct any rain away from the patio while work on it is in progress. Slight alteration to the original layout of patio stones, as the pattern called for more of the smallest size than we actually had, but it all worked out, it seems.
October 21 (Day 37) Got lucky with the rain again today, in that there was none, and this allowed the patio to be completed (the stones at least… stairs and fence still to come), preparations for the base of the flagstone path to be done, and the eaves troughs on the west side to be installed. Patio looks amazing.
October 24 (Day 40) Well, I won’t be needing to mow the lawn anytime soon, but a little topsoil is a good start. And we won’t be harvesting grapes from the grapevine anytime soon, but at least it once again has its pergola to grow over and bring us some shade, maybe, in a year or two…
As well as the pergola being back, we have a new privacy fence on the east side of the patio, with a smaller front fence and gate, and some new stairs, coming soon. And the flagstone path is back in place.
Meanwhile in the sunroom, the first round of drywall taping and mudding is done, but taking a while to dry. Interior window and door trim is being worked on offsite, as is their custom. It’s a bit awkward to get into the sunroom right now — a plastic sheet covers the doorway from the kitchen (to keep dust out), and you have to go up a ladder to get in from the outside — so no pictures recently.
October 28 (Day 42) Work continues inside on mud sanding and paint prep, outside on stairs and fence, and spreading some topsoil around.
October 29 (Day 43) Inside, paint prep is done, and primer coat applied. Outside, fence is finished except for the gate. In the front yard, topsoil has been spread over the areas chewed up by machinery, and seed and fertilizer scattered around. Ground is in decent shape at the front, so hopefully we’ll have some grass by next year.
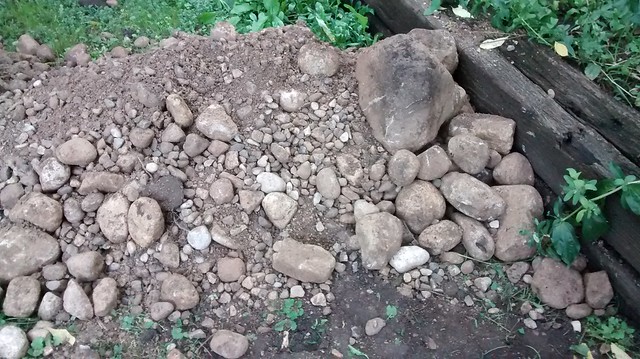
But we hit a bit of a problem when Lynda went to replant a few plants she’d rescued from the original garden. The new garden area, after the yard was dug up for construction and then the dirt shoved back into position, ended up rockier than before, pretty much impossible to get a shovel into, and therefore unusable as a garden. The crew went at it with pick axes and mixed in the last of the topsoil we’d ordered, but it still wasn’t usable as a garden. Attempting to put the bird feeders back into the ground was equally challenging. They’d go in about three inches, then stop with a clunk as they hit the pretty-much-just-gravel layer. Apparently it’s too late in the season to get a big order of topsoil, so we decided that much of the replanting would have to wait until spring. We’re toying with the idea of creating a raised bed in the problem area.
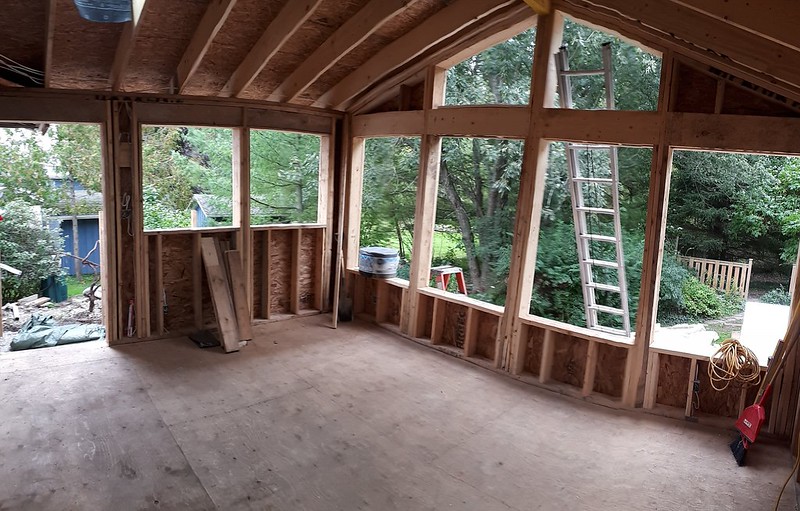
November 1 (Day 46) Our pointy windows finally arrived, and were promptly installed. Nice to be rid of the placeholder plywood and get the extra light in. The build-outs for all of the lower nine windows are done being painted and are onsite, with the first two installed. The painting is complete within the sunroom, but we’ll be carrying the colour over into the kitchen, so that’ll be fun. (not)
November 7 (Day 50) Had a pretty decent amount of snow overnight — first appearance of road sanders and ploughs — but the good news is we’ve been pretty much done with outside stuff for a while now. Just the patio gate and the crawlspace lockset to be done. Meanwhile inside, yesterday the kitchen had two coats of paint in the new colour, and all the window and door trim is now done in the sunroom. The new flooring has been brought inside to acclimate, and the underlayment was installed today.
While preparing the kitchen for painting, we noticed the beadboard backsplash had some problem areas due to water damage (it’s basically MDF, which loves water) so while the crew is still here, we decided we’d ask them to carry on and install a proper ceramic tile backsplash. We’ll be shopping for tiles tomorrow.
November 8 (Day 51) The kitchen has now had two coats of the same slightly paler yellow paint than it had, the same colour as in the laundry room and the sunroom (since they all sort of join up). The old window that looked out from the kitchen sink into the sunroom (and which was the original outside facing window from before there even WAS a sunroom, same vintage as the old sliding patio door) has been removed and a plain opening finished and trimmed. It nicely frames a view of the new feature windows in the sunroom.
In other progress, the first few rows of the sunroom flooring have been installed, the rest should follow Monday. After that, not much left to do except the electrician will be coming to install all our fixtures and switches and such. It will take a couple of weeks to get all the bits we need to proceed with replacing the degraded bead board kitchen backsplash with some nice tiles, which we picked out today. No word yet on the patio gate hardware, but we’re not in a hurry for that.
November 11 (Day 52) For all intents and purposes, the sunroom renovation (rebuild) is DONE… The floor is down, baseboards installed and paint touched up where nails went in. Even the patio gate is now installed. The rather glaring exception to the idea of being done is that we still need the electrician back to install all the switches and outlets and fixtures and the electric heater in the sunroom. The OTHER glaring exception to the idea of being completely finished is the little last-minute add-on project of the backsplash in the kitchen. We’ll be installing some nice ceramic tiles on the three walls that currently have the bead board, but not for a couple of weeks, probably. Will hopefully have final photos of the sunroom by the end of this week, after the electrical work is finished.
Nov 14 (Day 53) Electrical work only, today. Outside light fixtures were applied – Carriage-style lamp over the patio stairs, and pair of floods at each corner of the sunroom, which lights up the whole backyard quite nicely. All the switches, plates and fixtures, including the supplemental electric heater and the hanging lamp, have been installed. None of the stuff inside the sunroom is live yet, though, and the electrician is due back tomorrow (we hope) to finish up.
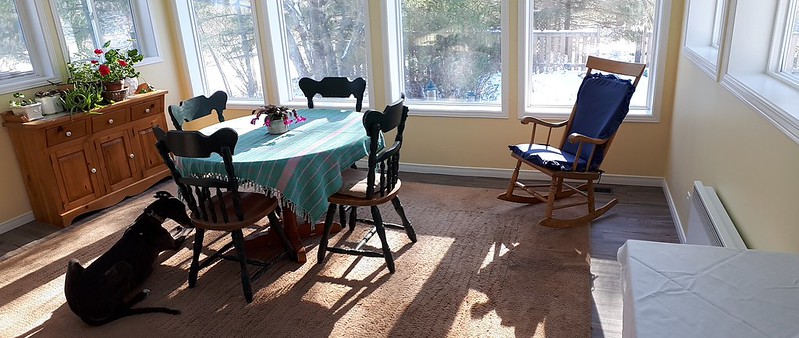
November 16 For the first time since August, we’ll be having dinner in the sunroom!
This handsome fellow announced his presence by tap-tap-tapping on the basement window, no doubt challenging his reflection. We’ve had a robin do that a couple of times as well. It’s a spring thing.
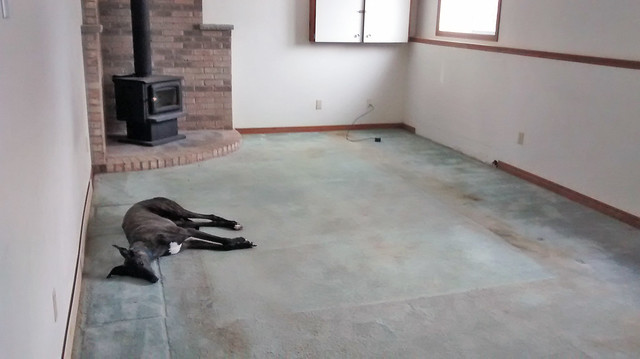
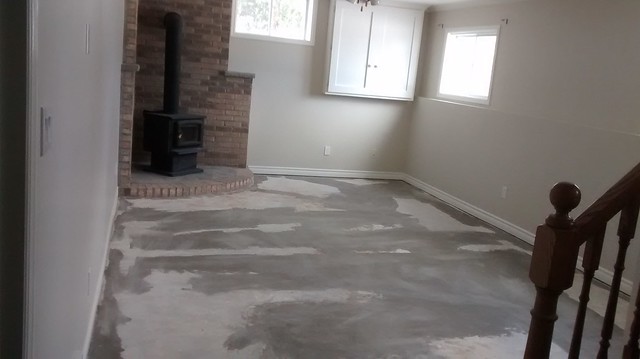
Reno starts tomorrow. Cody enjoys the wide open spaces and the no doubt fragrant carpet. Meanwhile in the rest of the house, we’re living like hoarders. Reno starts tomorrow. Carpet will probably be the first thing to go.
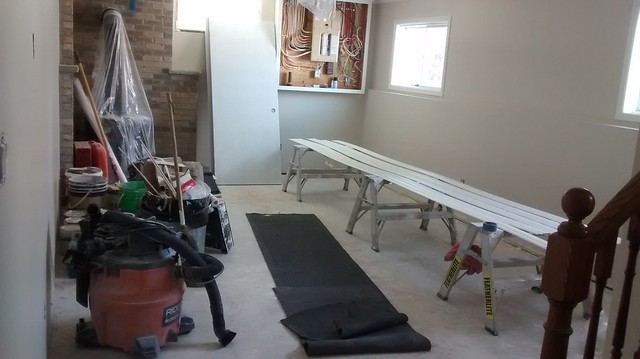
After week one of the rec room reno, everything that is being ripped out has been ripped out, holes that need patching have been patched, the dust has literally settled and painting has begun. Next week, painting will get finished and a new panel box will be built. All this in a timely and professional way by skilled craftsmen who are not me.
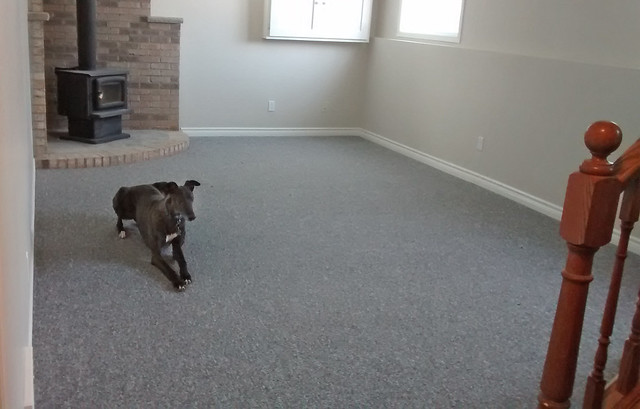
After week two, rec room reno is nearly done, just waiting for the carpet to be installed. You can’t tell from the photos, but trust me, it’s a hell of an improvement, floor to ceiling.
We have carpet …aaand we’re done… well, apart from moving all the furniture back in… no easy task… Cody gave the new carpet a good sniff, and he looked at one point like he might want to pee on it, but we kept him distracted and the urge passed. We hope.
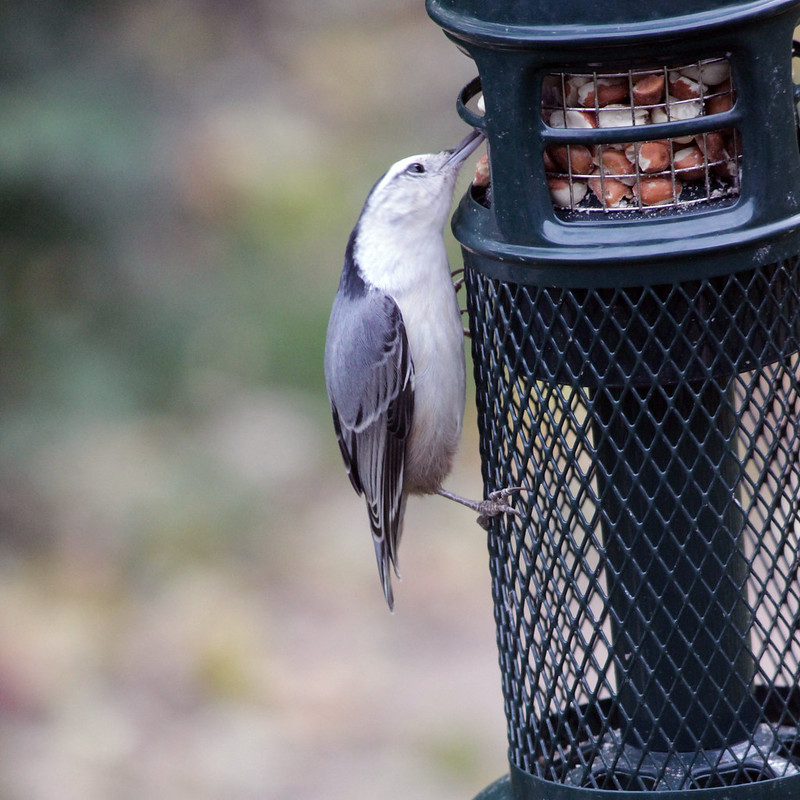
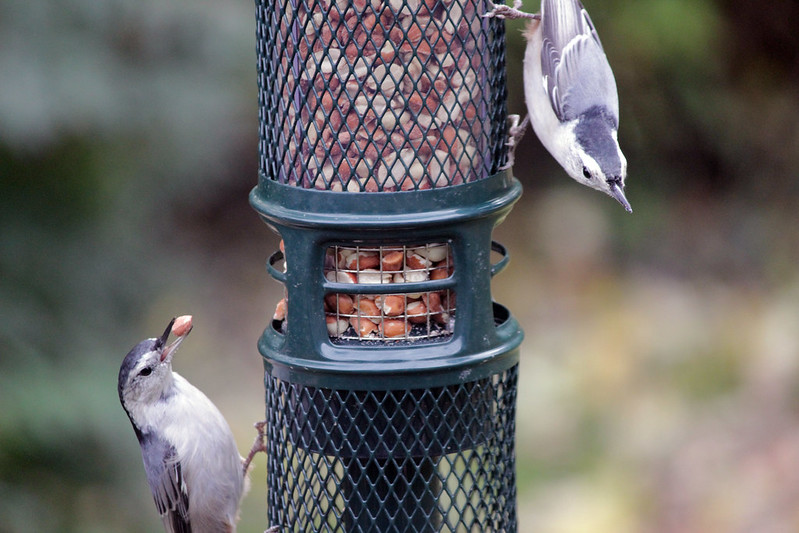
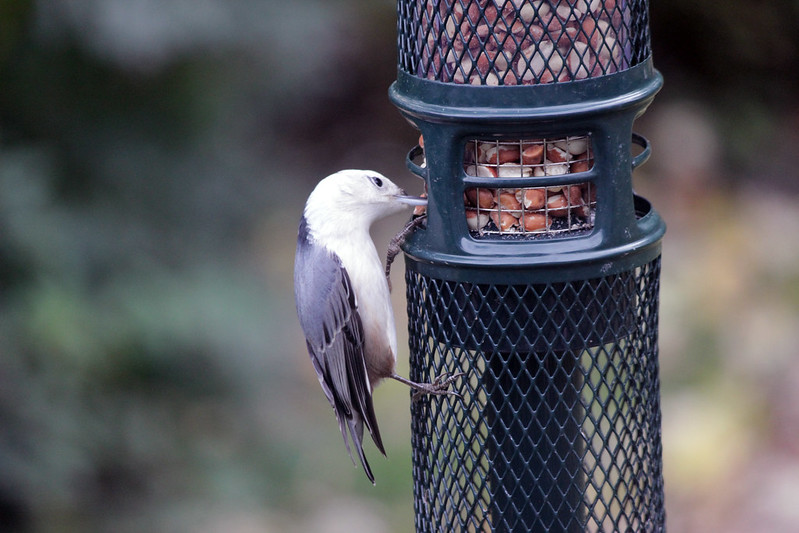
Our new Squirrel Buster peanut feeder is a hit with the Chickadees, Downy Woodpeckers, and Nuthatches. Haven’t got photos of the woodpecker yet, but he’ll be back. Chickadees are around a lot, but for the moment it’s the Nuthatch show.
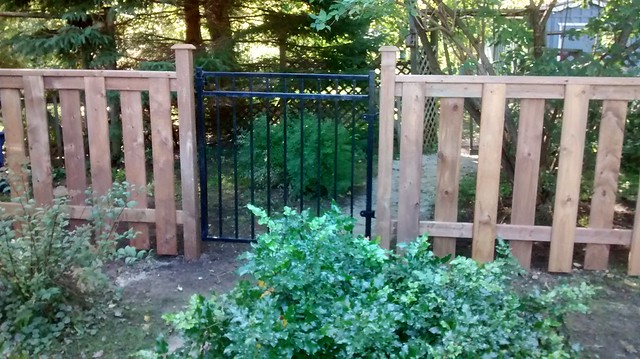
We decided we needed to replace the last remaining section of the crappy falling-down ugly fence that encloses the Back Forty. If we moved the whole thing forward (toward the house) about 10 feet, we could make the new section a straight run joining the existing two ends of the good fence, and avoid the obstacles that the old fence had to deal with. Here are some crappy cellphone photos documenting that process. (We had a contractor for this.)
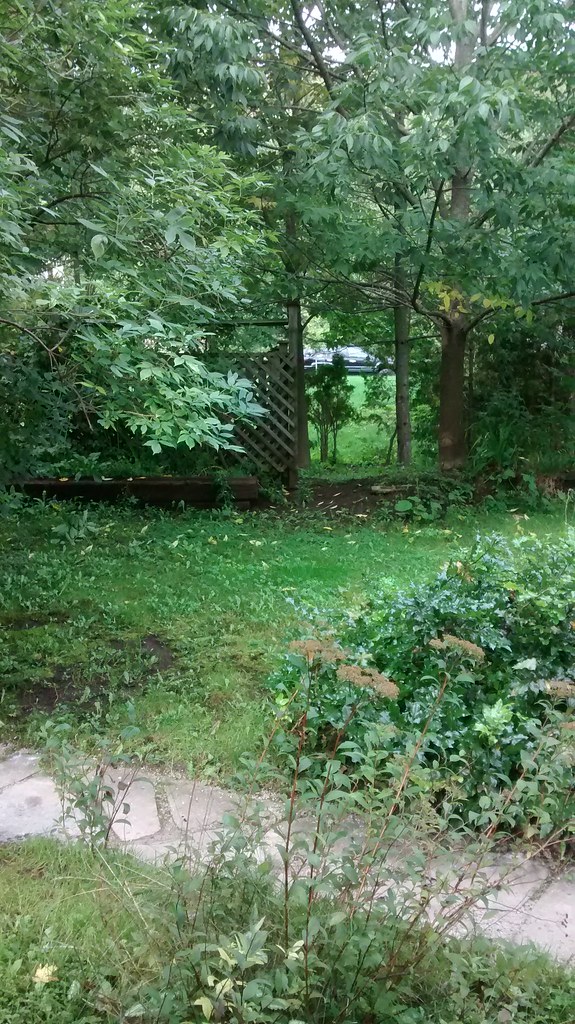
Below is the before picture looking west, where the flagstone path will intersect the line of the new fence and gate. in the background some of the old crappy fence can be seen. We did not tear that down yet, as we still needed to keep the dog contained.
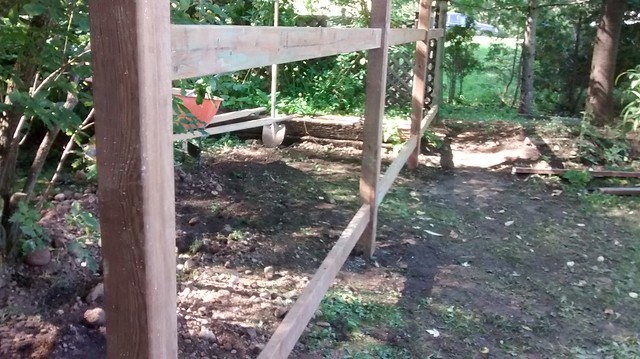
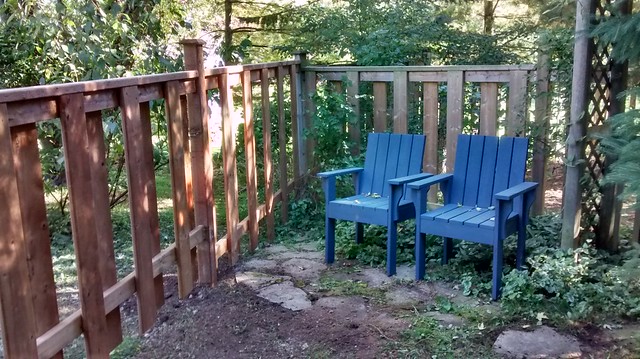
A string provides a reference to line up the holes. That short section of fence behind the blue chairs will remain, to define that corner, but it will no longer join the old crappy fence.
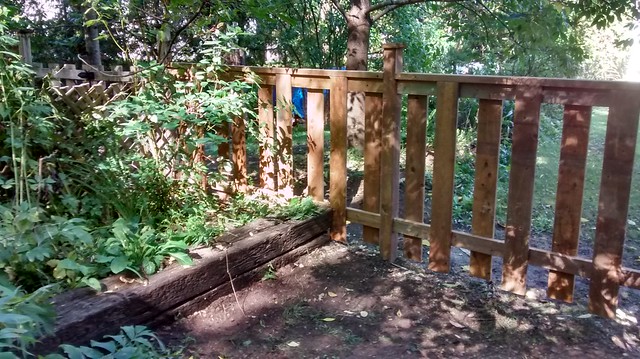
The first hole dug revealed a surprise: some kind of drainage pipe heading away from the house, probably coinnected to the weeping tile. We have never known of any drainage heading that way. It made us need to adjust the post hole location a little, and in fact another of the holes revealed another drainage pipe, running parallel to the first. No wonder the Back 40 can get kind of soggy in the low spots.
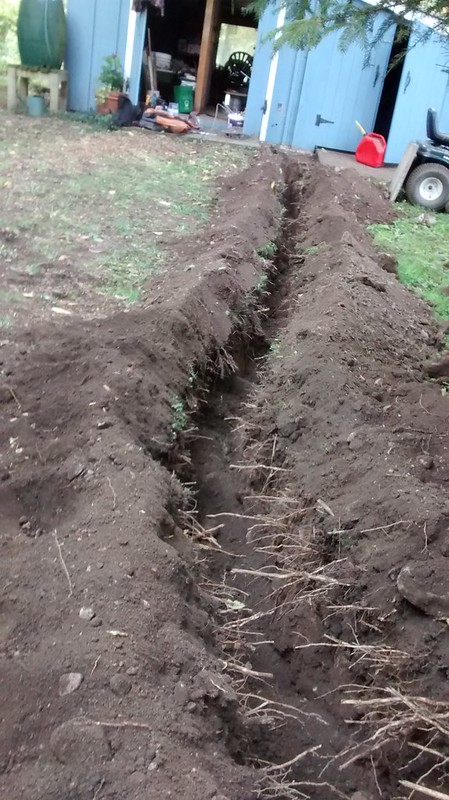
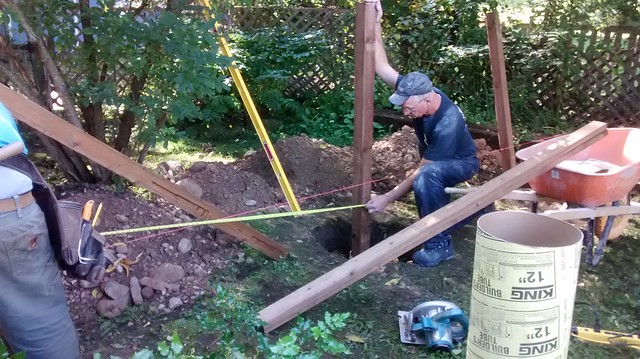
One thing we did predict was this. Me: “How long will it take to dig the holes?” Contractor: “Depends if we hit rocks.” Me: “Oh you WILL hit rocks…”
All holes finally dug, tubes in place ready for concrete.
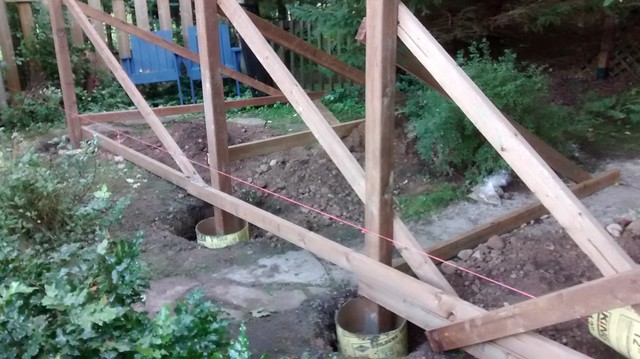
The posts need to be braced in two directions so they remain perfectly vertical as the concrete is poured.
Once the concrete sets and the braces come off, next come the rails.
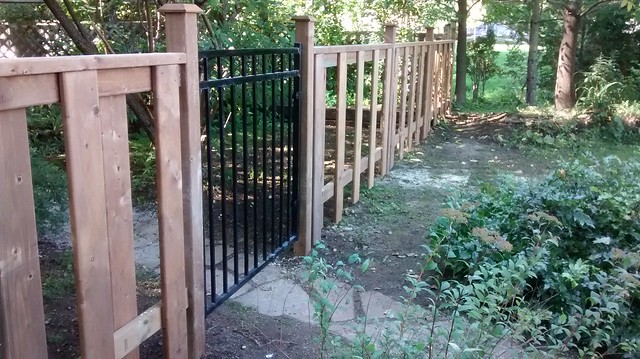
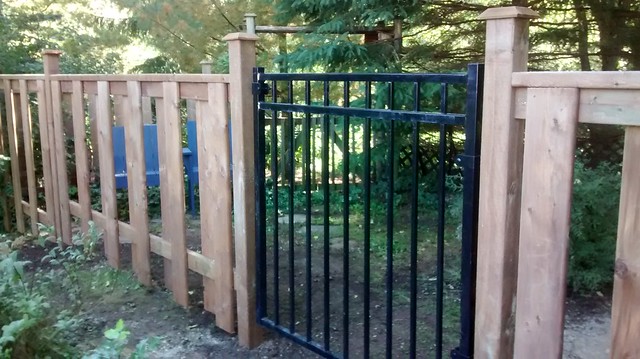
Rails, top caps, fence boards, post caps, install the gate, and we are DONE!
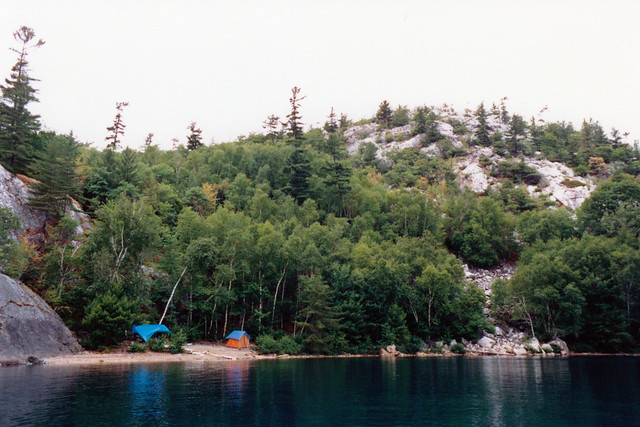
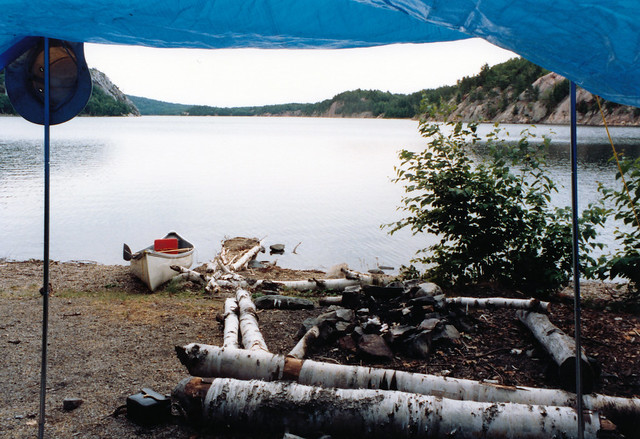
I just bought a new Canon scanner (CanoScan LiDE 220, it says here) and set about to test its photo scanning capability. I found these prints in an album, they’re from 1988. This was one of my earliest solo “interior” camping trips (I put that in quotes because while it was technically interior, the George Lake campsites require no portages.)
Killarney Provincial Park, in general, of all the many several places I’ve been, is one of my favourite places on the planet.
Click any photo to view larger on Flickr
Here’s a relaxing video (not mine) shot on George Lake: