

(Click any photo to view larger on Flickr)
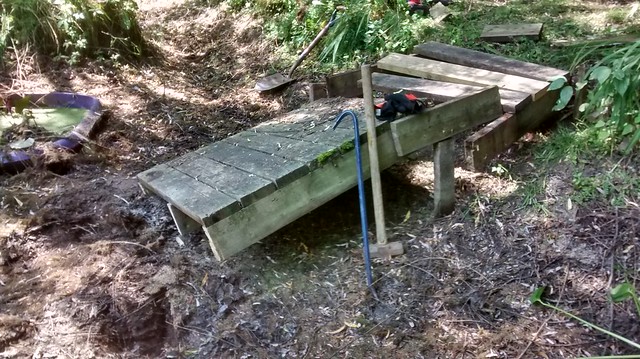
Our little pond has (or had) a “deep end” and a “shallow end” with a small island in the middle, accessed by a deathtrap of a gangplank bridge. The pond would typically spend the last 6 weeks or so of summer somewhere between almost empty and completely dried up. This led us (mostly Lynda) to think seriously about getting it lined.
The island was always the obstacle to that plan… you would have to cut the liner to get it around the island (there is a decent sized tree on the island so you couldn’t just cut a donut hole and drop it over the top). An obstacle, that is, until we talked to Ken Hutten at Hutten Landscaping, who had the idea to divide it into essentially two ponds, line the deep end only, and let it overflow into the shallow end if it needs to. Even if (when) the shallow end dries up, the deep end should still have lots of water. This involved connecting the island to the shore on two sides, with berms formed with the dirt dug out to make the deep end deeper.
The first step was removing the old “dock”, and cleaning up Kitsch Island before the crew arrived. I was able to do that part. I like demolition, and this was probably my last demo for a while, we’ve torn everything else down already that needs tearing down:
The crew arrived on Thursday morning with a Bobcat and a Dingo (construction machines have awesome names) which could be heard almost constantly over the next two days.
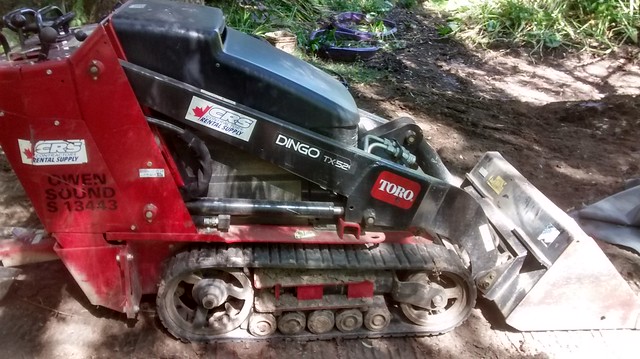
This video shows them deepening the deep end with the Bobcat and transferring material with the Dingo:
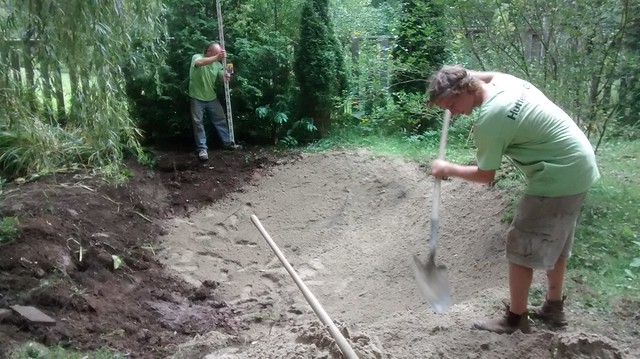
The first materials the crew brought with them were sand and topsoil, used to prepare the site to accept the liner:

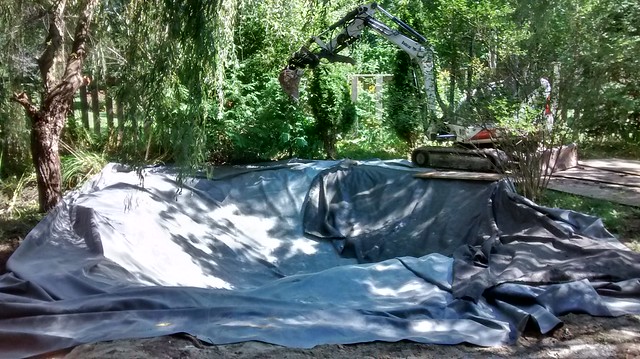
Once there is a decent layer of sand, next comes a layer of landscaping fabric, then the actual liner, then another layer of fabric. The fabric layers protect the liner from objects in contact above and below:
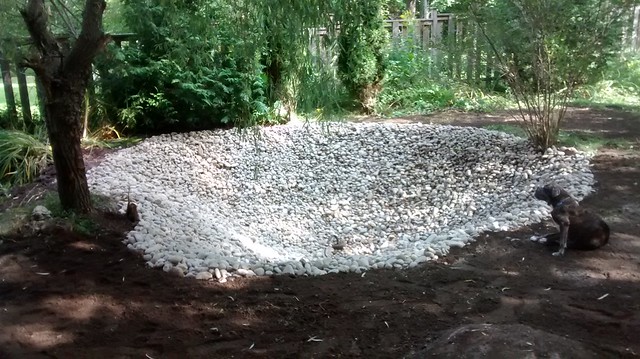
On the top layer of fabric, the Bobcat (with its fancy new sideways-tilting bucket) skillfully places the river rocks, the final layer:
Bell admires the completed project:
All that remains is to clean up and repair the lawn where the machines chewed it up. They brought lots more topsoil for this:

They relaid the slabs where our Muskoka chairs go, improving on the pattern while they were at it. The dogs approve:

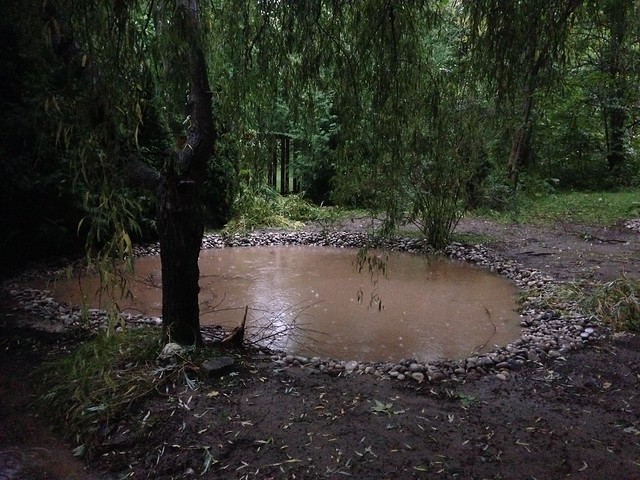
Literally the moment the crew left, the skies opened up and a rainstorm of historic proportions filled the pond in about an hour:
With only a few loose ends to deal with, I’d have to say this was a pretty successful project, executed with professional precision by a fantastic crew, and a real pleasure to watch from the safety of the sidelines as it all fell into place.
(All photos by me except the last one by Lynda Chiotti).